If you are a self-employed entrepreneur who frequently provides recurring goods or services, you can use the creation of articles and item lists.
First, activate the Product module via the Modules page. Then you can get started.

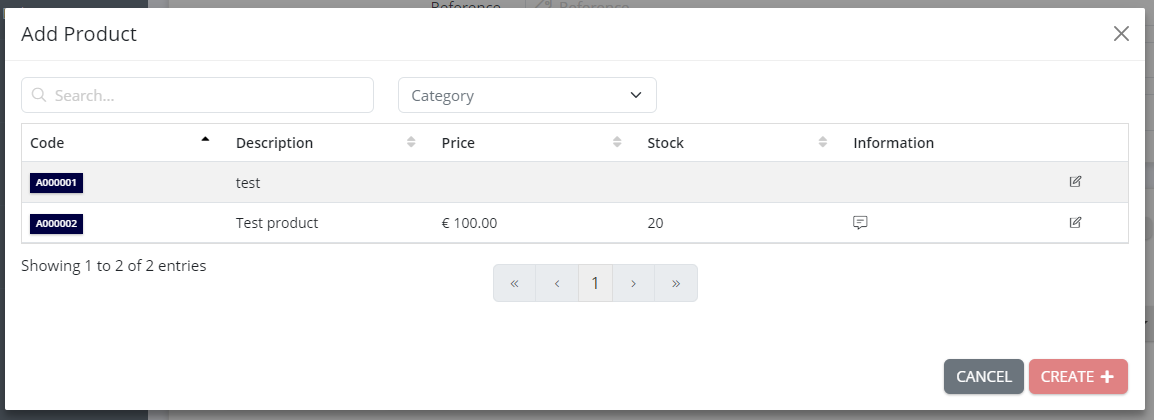
How to Create products
Go to the 'Products' section and click on Create. Enter the description and price. Optionally, you can also track inventory by filling in the **quantity in stock.

Format your text in the description using the text editor.
Check More Options to further fill in details such as description, price, quantity in stock, item code, unit, internal information, etc.

![]()
If everything looks good, click the blue **'Create Article'** button. A new article will now be generated.
Creating an product without prices
Using the Informative Line' option, you can create articles without specifying prices. This is useful for adding additional information to the article without entering amounts.
Activate this option via the toggle switch.

The article with the 'Informative Line' has now been added. You can find it by entering the keyword or title of your article in the articles overview.
The informative line can also be used for bundle articles' and 'item lists'.
Which item code to use?
Create categories by using a prefix followed by a sequence number (e.g., ABC000001).
If only the category is provided, the code will automatically be completed with a sequence number.
Item codes are sorted alphabetically and must always be unique.
If no code is provided, the system will automatically generate an item code.
Update an Article
To change the item number (or other information), click on the item code and update the article via 'Actions'.


Product with customized prices per customer
With custom prices, you can set different prices for each customer (or customer group) for your article. Click on Actions > Custom Prices and enter the prices.

If a different price has been set for a specific article, you will now see a symbol in the article overview indicating that there are multiple prices for the item.

Article with Customized Prices per Customer Group

To add a customer group, go to Settings > Advanced> Custom Fields (previously Standard Fields).
Finally, go to Articles > **Actions > Custom Prices > Per Customer Group to enter the different prices.
Finally, go to articles > actions > custom prices > by customer group to enter the different prices.
Invoicing Products
Created articles can be easily added to invoices.
Go to 'Invoices', click the red 'Create' button, enter a new or existing customer, and add the articles you wish to invoice.
Then select the articles you want to add via the purple button.

Note: Changing the quantities will automatically adjust the inventory/stock.
Then click on 'Create Invoice'.
